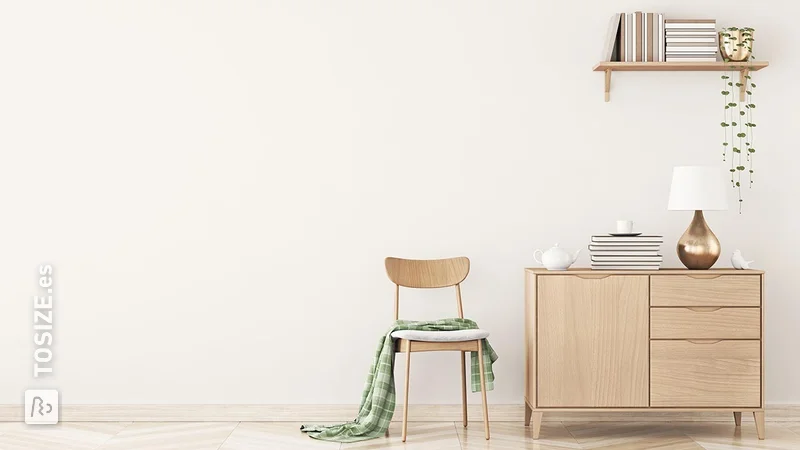
Making your own wall shelves
Want to make your own wall shelves? One or more homemade wall shelves are ideal for putting your crockery on, storing your book collection or displaying your latest LEGO projects. But how do you go about making your own? At TOSIZE.es, we provide you with perfectly cut-to-size sheet material. How to do the rest, we tell you in this article.
In this article:
- How do you make your own cut-to-size wall shelves?
- What items do you need to make wall shelves?
- How do you draw or sketch your wall shelves?
- How do you attach a wall shelf?
- How do you mark off the drill holes on the wall?
- How to make a floating wall shelf?
- How thick should a wall shelf be?
- What material do you use for wall shelves?
- Examples of wall shelves made by our handymen
- Get started with your own cut-to-size wall shelves
How do you make your own cut-to-size wall shelves?
Wall shelves are widely used in every interior. Just look at the examples of our handymen. They use them to store things or to display decorative objects. Wall shelves can therefore be found in every room of your house: in the shed, garage, living room, kitchen, bathroom or bedroom.
How to make your own cut-to-size wall shelves depends on your exact needs and requirements. Below, we explain in more detail how to tackle this lovely DIY project.
What items do you need to make wall shelves?
To make your own wall shelves, you will need a number of materials. Get the following items ready before you start your job:
- Cordless drill: to easily pre-drill holes and drive the screws into your material, also to drive screws into the dowels in the wall if necessary
- Hammer drill or impact drill: if you want to hang the wall shelves on a concrete wall, you will need this to drill holes in the wall
- Spirit level: to make sure your wall shelves hang nice and level
- Wood glue: you can use it to glue different boards together in the corners, possibly with the use of dowels
- Primer, edge sealer, lacquer: Some timbers from TOSIZE.es still need to be finished, though of course this is your own choice
- Sandpaper: always handy to have on hand to smooth away any unevenness or clean up your drill holes
- Tape measure or folding rule: to measure your wall shelves exactly and order the right size of panels from us
- Screws and plugs: to fix the shelves to the wall and to screw the shelves to the supports
- Graph paper, pencil, eraser, ruler: in case you want to make a drawing of your project first
How do you draw or sketch your wall shelves?
Before you start any DIY work, it might be useful to make a drawing of your project. This won't be necessary if you only want to hang a few wall shelves, but for an elaborate shelving project with several shelves, we definitely recommend it.
A good drawing will give you a good overview of the job. That way, you know exactly which materials you need and what dimensions they should have.
You make a sketch or drawing with a pencil, graph paper and an eraser. If you are handy with it, you can also use an online programme such as SketchUp.
An added benefit of drawing out your wall shelving project is that you force yourself to think carefully about each element. How will you attach the shelves to the wall? And if you place the shelves in a corner, how will you connect corners together?
And what about the end edges of your planks? Would you like us to round them off or chamfer them for a different effect? We offer various finishing options for our board material.
You might like the idea of using tape to mark the position of your wall shelves on the wall first. This will give you a better idea of how much space the wall shelves will take up in your room.
Have you measured and drawn all the measurements correctly? Then use this list to order the sheet material you need, precisely cut-to-size, in our webshop.
Tip: you can mark each board with the label of your choice when you place your order. That way, once your wood is delivered to your home, you will know exactly which board belongs where in your design.
How do you attach a wall shelf?
An important part when hanging a wall shelf, is the fastening. You can attach your wall shelves in several ways.
Fastening with shelf brackets or shelf supports
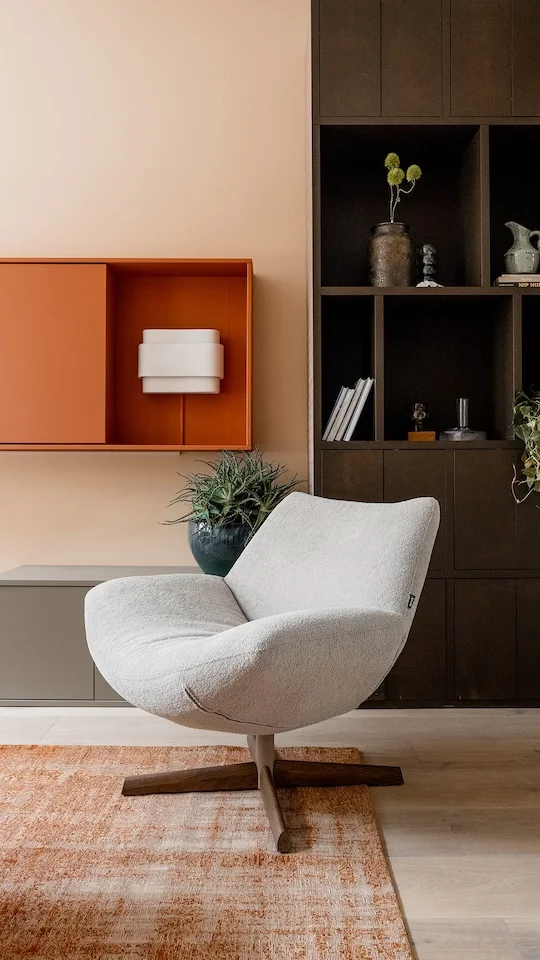
Perhaps the most obvious solution is this: fix your wall shelves using shelf supports or shelf brackets. You can buy these at the hardware store, for example, and they come in many variants and styles. Handyman Thomas, for example, has chosen wall shelves with stylish leather shelf supports.
You fix the shelf support in the right position on the wall and attach the shelf on top of this.
Fastening with shelf supports with rails
If you want to hang multiple shelves, one option is to use shelf supports with rails. This is a faster way to hang multiple shelves. Once you attach the rails to the wall, all you have to do is hook the holders into the rails and mount the shelves on them.
Fastening with slats or beams
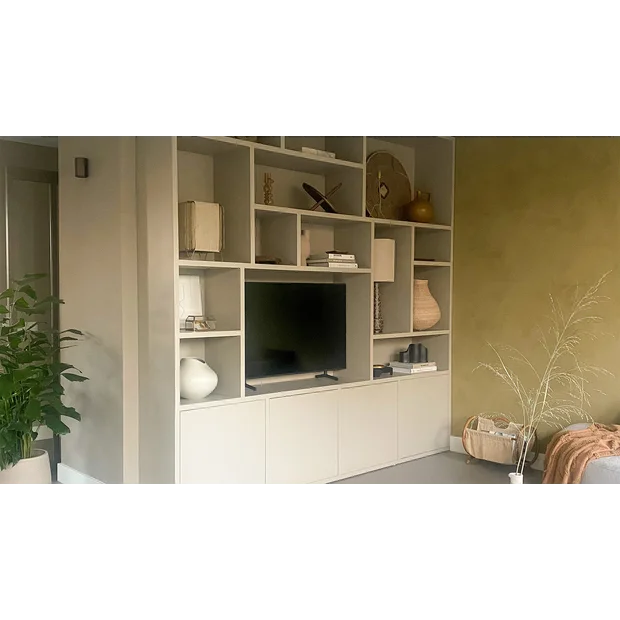
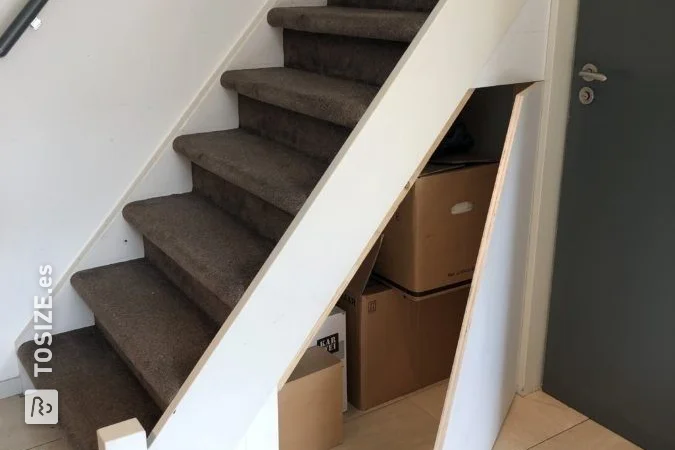
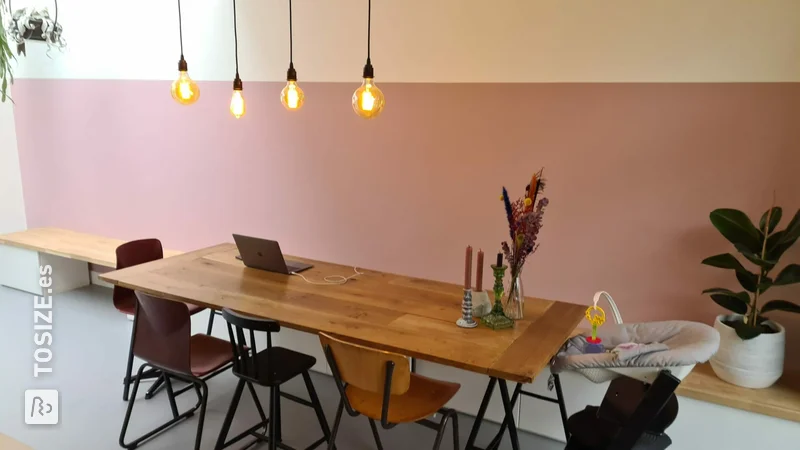
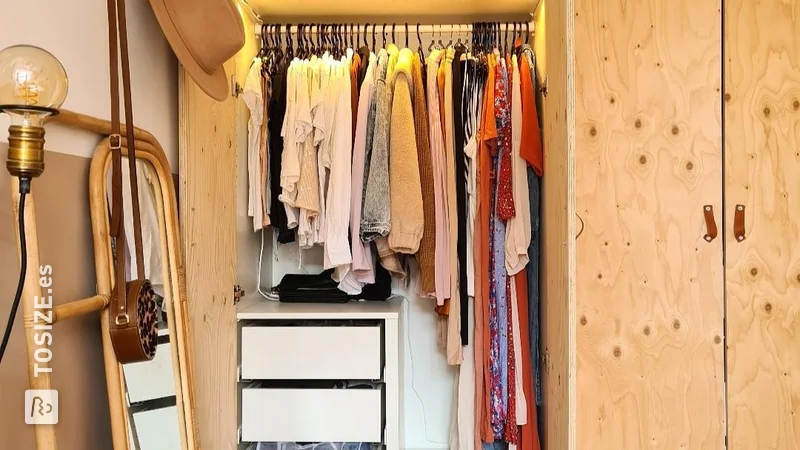
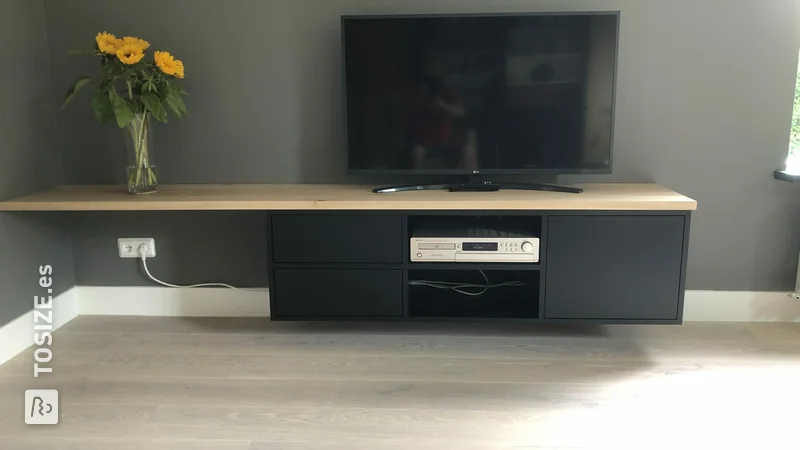
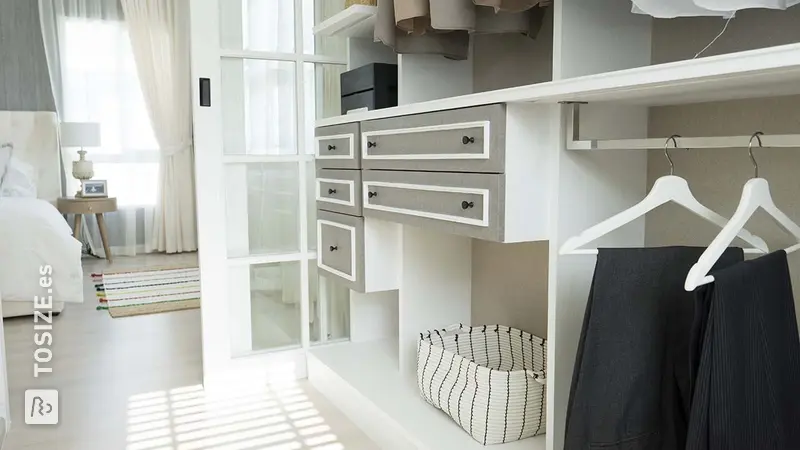
By screwing slats or beams to the wall, you can fix the wall shelves on top of them. This is a particularly useful technique if you place your wall shelves in a niche, as handyman Sanne did for her wardrobe, or if you place the shelf between two walls. Of the latter handyman Peter's DIY project is a great example.
How do you mark off the drill holes on the wall?
Whichever fixing you choose: it is important to mark the drill holes in the wall properly. You can do this by drawing a horizontal line with a spirit level, for example.
You can also first fix the shelf support in the wall on one side only, then lay the shelf with the spirit level on top and mark the second drill hole accordingly. This ensures that your wall shelf will hang level.
How to make a floating wall shelf?
Another great technique we see many of our handymen using is floating wall shelves. How do you attach a shelf floating on the wall?
One option is to do this using special floating shelf holders. You can order these on the Internet or buy them at the hardware store. This usually involves drilling a few holes in your shelves first. You attach the blind shelf holders to the wall and then slide the shelf over them. The exact method varies depending on the product you use.
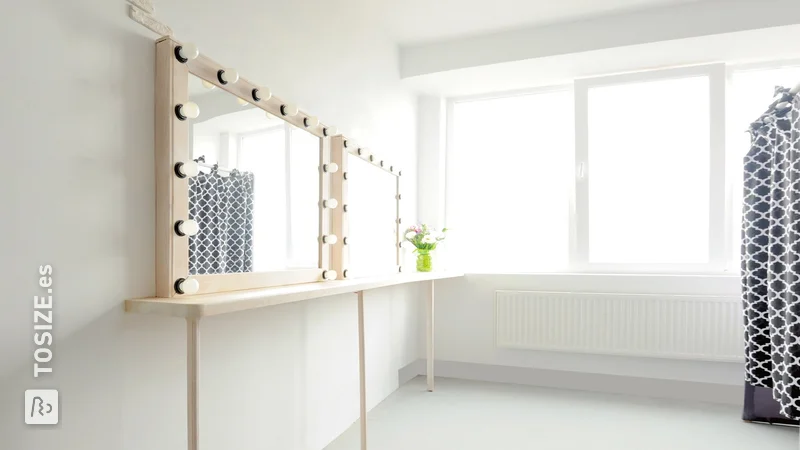
Another way is to do it as handyman Thomas did in his project. He mounted narrow slats against the walls and milled slots in the boards. He could then slide the planks over the slats like this. Nicely done!
How thick should a wall shelf be?
The thickness of the wall board depends entirely on the purpose you have with the boards. How much load will the shelf have to withstand? Will you fill it completely with heavy books or just place a few LEGO houses on it? Heavy books require a thicker shelf.
In addition, the type of material also plays a role. Wooden carpentry board is stronger than softwood board.
Of course, the load-bearing capacity of the board is not only determined by the thickness of the board and the material type. The fastenings also have an important function in this. And the strength of the wall to which you attach the plank. We advise you not to hang shelves on a hollow wall, for example.
In the vast majority of cases, a 30 mm thick plank will suffice.
What material do you use for wall shelves?
For wall shelves, you can use many different materials, which can be found in our webshop. Think MDF, plywood, plywood, OSB, concrete plywood, underlayment, furniture panels, chipboard, carpentry panels, HPL or board. The list is long!
Among our handymen, we see the use of the following materials a lot.
Timber board
The vast majority of handymen use timber panels. Not surprisingly, as this is a tremendously sturdy and versatile material and therefore ideally suited for making wall shelves. We sell joinery panels in many varieties, such as oak, pine, ash or cherry and in many versions and thicknesses.
Lumber panels have a beautiful, natural look, are robust and of high quality.
MDF
MDF board material: the big all-rounder in our range. Available in many types and variants, such as moisture-resistant or with lacquer backing. MDF is very easy to process and does not splinter.
Examples of wall shelves made by our handymen
Still looking for inspiration for your wall shelving project? Our handymen went before you, take a look.
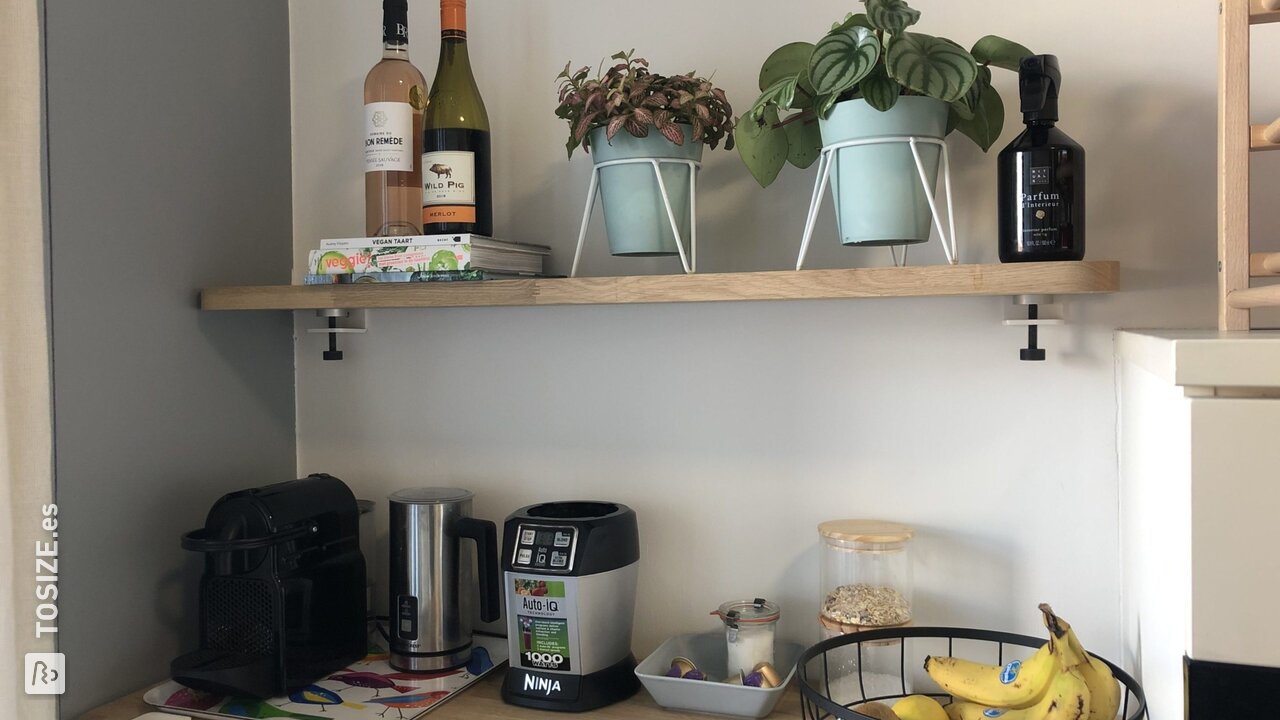
Sturdy wall shelves for the kitchen
Daniel wanted to create some space for his crockery in his new home. The result is a beautiful, sturdy wall shelf made of pine lumber panels. Sticking an LED strip underneath gives it a nice extra dimension!
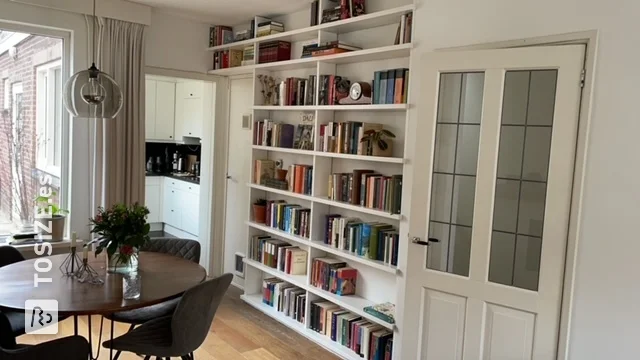
Space for your books
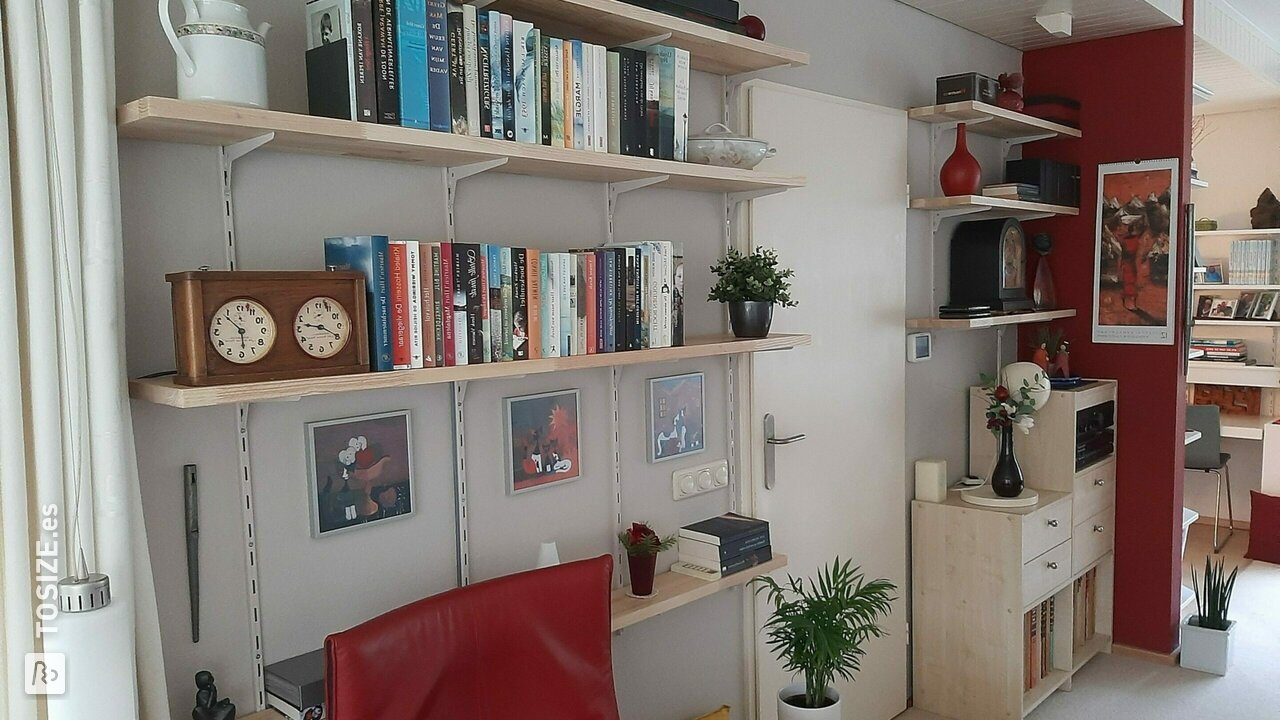
Got a lot of books you want to give a place? This handyman made a wall with shelves of ash wood. He rounded off the edges and varnished them himself.
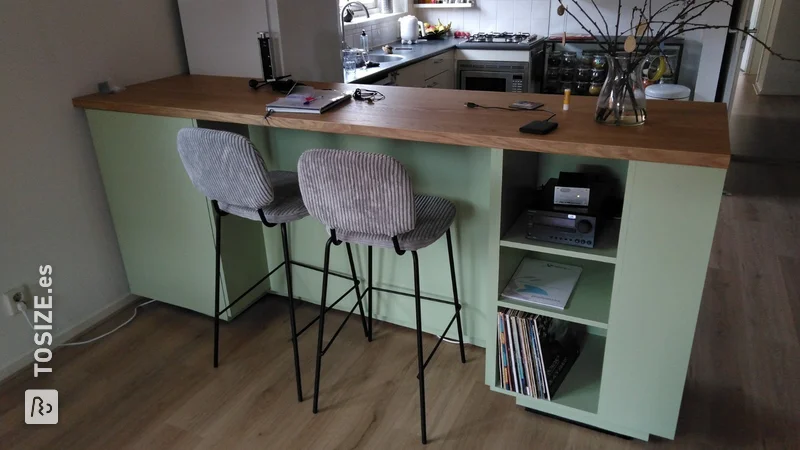
Bar table with wall shelf
Leide wanted something more cosy in her kitchen and installed a bar with a beautiful, oak wall shelf above it. She treated the shelves with a stain to make them dirt- and water-resistant.
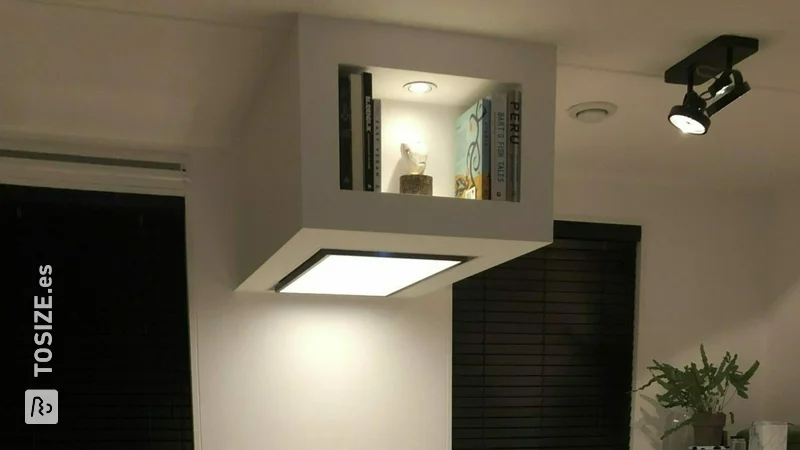
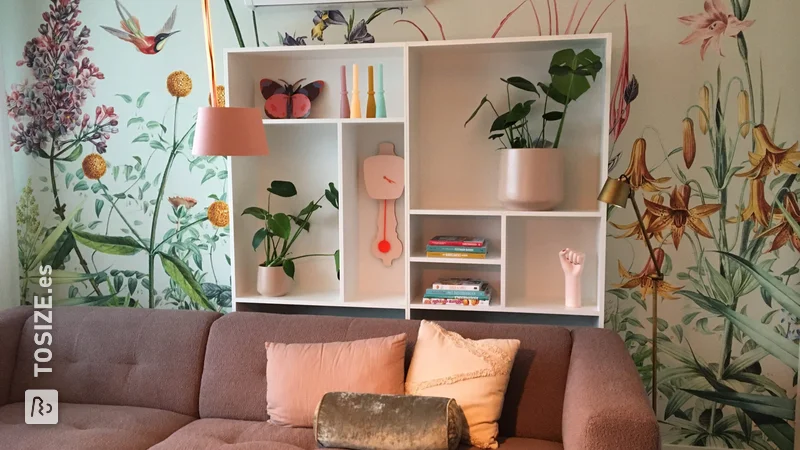
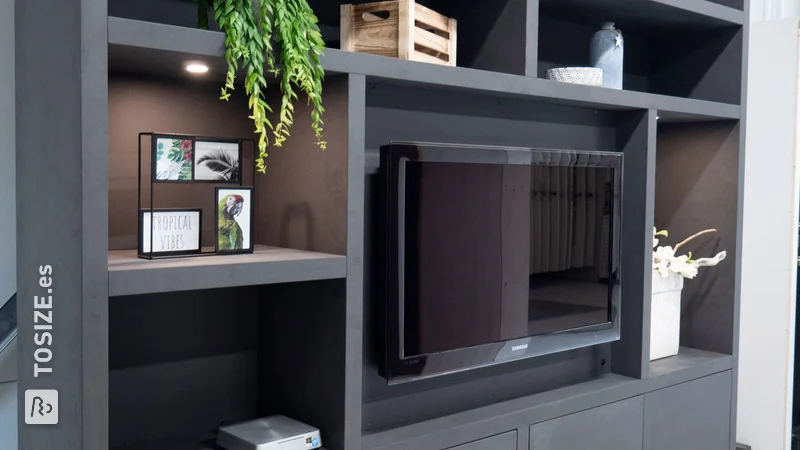
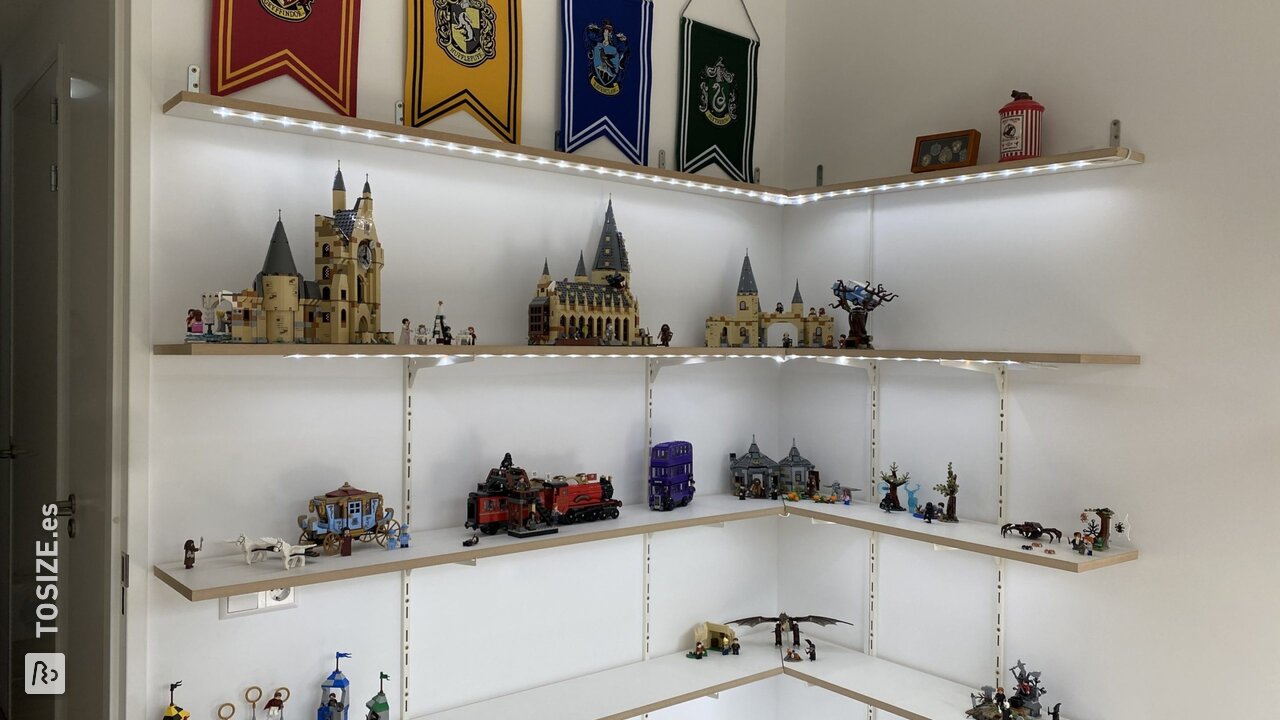
Wall shelves with LED lighting for LEGO
To nicely display his LEGO collection, Simon made these wall shelves with LED lighting. He used carriers with rails and MDF with lacquer backing for this job. This gives him room to build again!
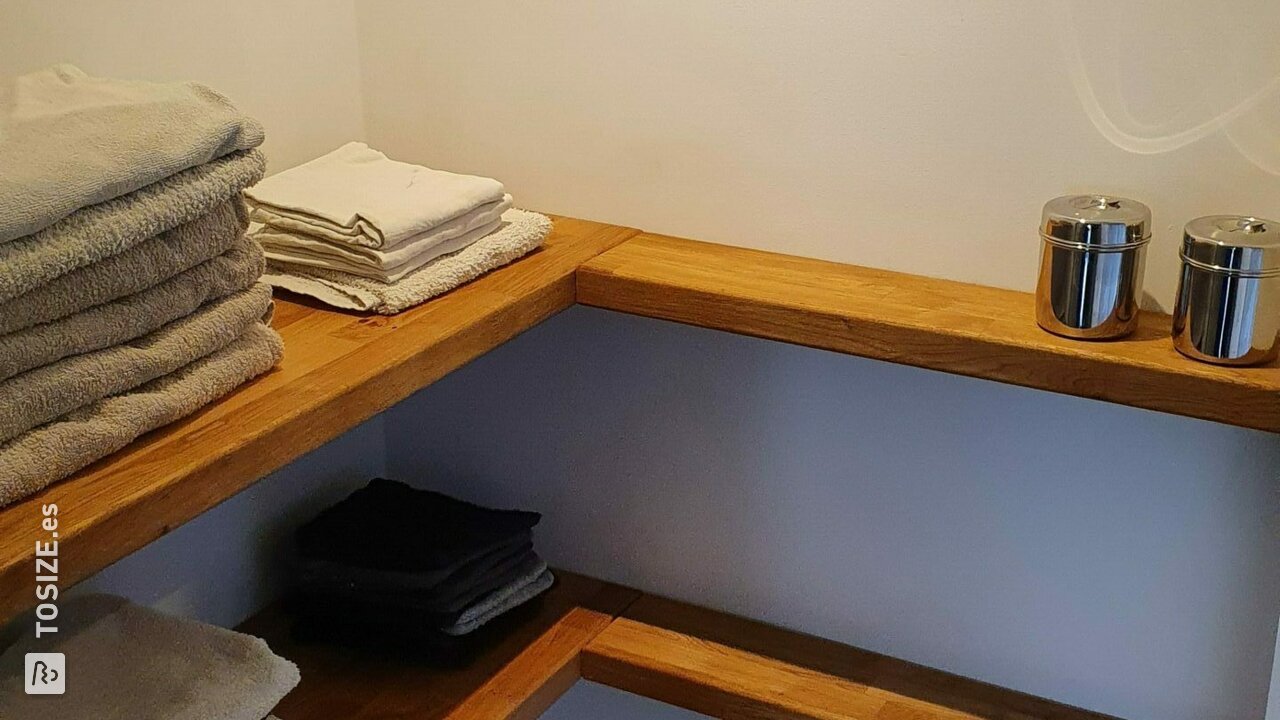
Blindly mounted shelves in the bathroom
Bart created a nice place for towels and flannels in the bathroom. He used oak lumber panels that he fixed blind. He had the sides rounded off by us. A beautiful, rustic result!
Angled shelves with dowel joints
In this project, you can see how a corner shelf was made, by joining two mahogany panels together with dowels.
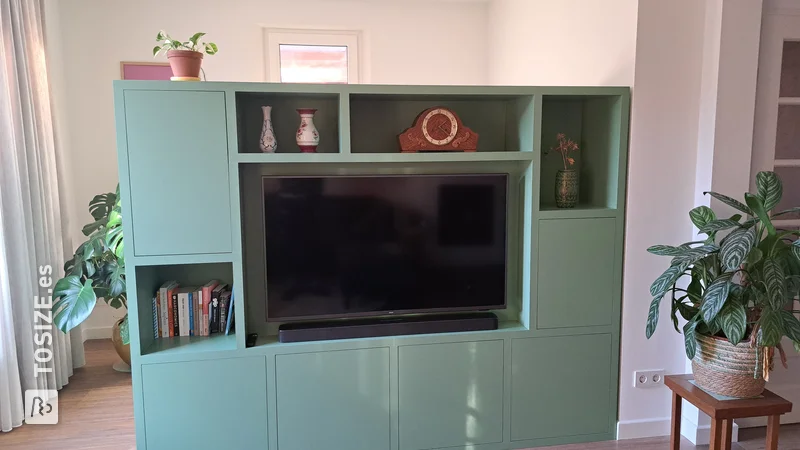
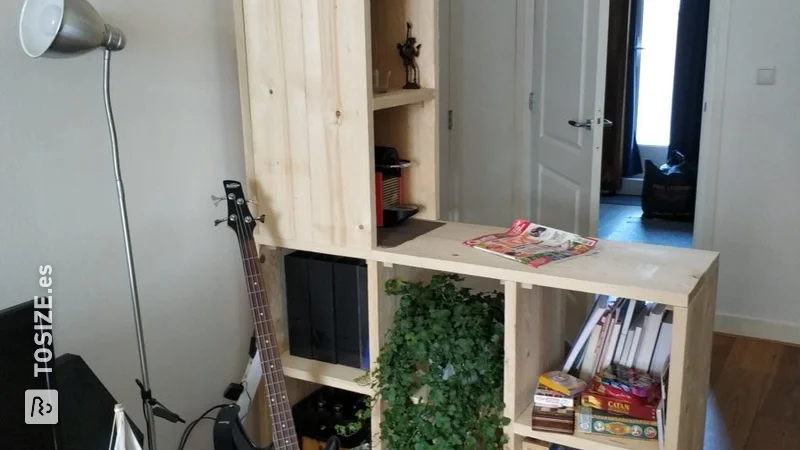
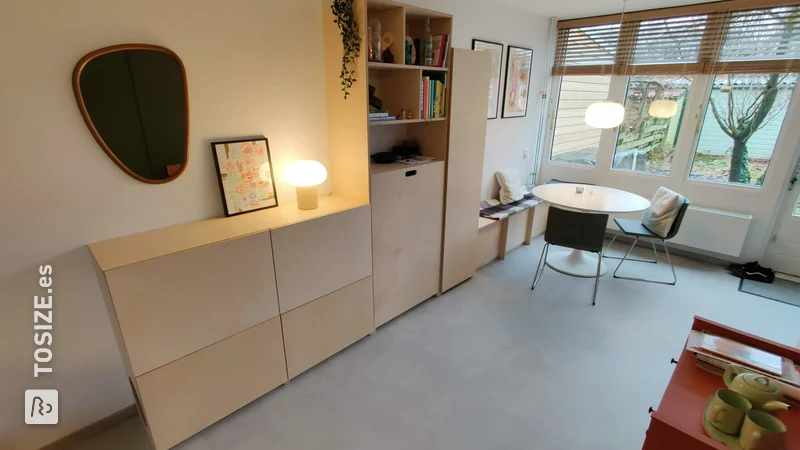
Retro wall system made of oak timber boards
Thomas made this retro-looking wall system from lumber panels. He bought the wall system at the hardware store and finished the oak planks himself. A beautiful wall system with plenty of room for decoration.

Get started with your own cut-to-size wall shelves
With the tips and advice in this article, you should succeed in making your own wall shelves. In any case, we are happy to get you started by cutting your materials to size and delivering them to your home. That will save you a lot of work and hassle.
Good luck with your wall shelves!